Reminiscing about the early days of SCUBA – Part 1

This desire to participate in underwater experiences, and there are several in SCUBA (Tech, Wreck, Hunting, Cave, and many more) doesn’t just materialize in our heads. Instead, I believe it’s a result of the total sum of our life-long experiences, inspired through our education, culture, family, religion, school, television, peers and other sources.

I for example grew up watching black and white episodes of Sea Hunt on television. For me, Lloyd Bridges and the character he portrayed in his TV series shaped many of my own desires for underwater exploration. Later on, Jack Cousteau’s adventurous episodes about ocean research helped me understand many important principles of marine science and SCUBA diving as well. So it’s only natural that about a year ago when I noticed a lady bring an old school regulator to Peter Friedman’s dive shop in Stuart Florida I wanted to buy it. That regulator, one that looked just like the one Lloyd Bridges used in his series, was not in working condition but to me that didn’t matter, it was a part of history which I personally identify with.

Peter gifted me the regulator – I can’t tell you just how much this meant to me especially when I examined the back plate and inscribed there, saw “Aqua-Master 2 Stage Regulator” and the names “Cousteau – Gagnan.” Wow, what a thrill to own a small part of SCUBA history.

Almost a year later, another friend, Scott Beckham, owner of Sea Level SCUBA in Melbourne, Florida repaired the regulator. Now that I own a piece of SCUBA history that works I can’t wait to try it. But whoa – that won’t be as easy as it sounds. There are important differences between my old school demand regulator and the modern regulators in use today. These differences will require changes to my equipment configuration and how I dive. Here are a few important things I must consider before attempting a dive with this older regulator.

Note that this is not a guide on how to use this old type of regulator and I am in no way providing any technical specification but instead, a short view of my experience as a diver who is happy and anxious to use it.

1. Pressure Limitation. – Scott had me test the regulator using an LP Steel 72 tank rated at 2250 PSI while holding 64.7 cu ft of air and sternly warned me that I should NEVER exceed that pressure with this old regulator. And while I could use a tank with more capacity I am still limited to 2250 PSI. So I am purchasing an LP Steel 72 tank – I’ll have to explain to my wife later why I need yet another SCUBA tank LOL. I believe an LP Steel 72 would be perfect for short shore dives like Blue Heron Bridge, one of my favorite dive spots. The other reason for buying the LP Steel 72 is that it’s a perfect era match for this regulator.

2. No low or high pressure ports. – The regulator has a built-in low pressure connection that delivers air on demand to a fixed hose and mouthpiece. There are no low pressure ports for octo, inflator hose, or high pressure ports for a surface pressure gage (SPG). Without an SPG you would not know how much air is left on your tank until you run out. Back in the day when this regulator was in use, divers used K valves on their tanks. With a K valve, when a tank reaches a pressure of 300-500 PSI, the air supply stops. A small manual lever on the valve allows air flow to resume so the diver can surface.

3. Safety measures. – From a safety point of view, a 300-500 PSI tank pressure would not provide an adequate supply of air to ascend from depth and perform a 3 minute safety stop. I would not use this equipment configuration for a dive exceeding a depth of 20 feet – that is a personal choice. I understand that some may disagree with this estimate and that’s fine. I would rather play it safe.

4. Surface Consumption Rate (SCR). – Another consideration has to do with Surface Consumption Rate (SCR) at depth. I would not try to use the abovementioned equipment configuration and should calculate my SCR to time my dives with this new configuration, and ascend before my K valve cuts off the air supply. What else could I do in order to make this a fun and safe experience? In my case, I plan to bring a 30 cubic foot deco bottle just to make sure I will have sufficient air to return to shore or reach surface if anything goes wrong.

5. Flotation device. – I can certainly use my Buoyancy Control Device (BCD). However, because there is no connection for an inflator hose, I will have to inflate my BCD orally and deflate it manually. This is a skill we learn in Open Water training but also one which we do not practice enough.

6. Purging the regulator. – There is no purge valve on this regulator and as it was explained to me, you must shift your body to one side in order to accomplish this.

7. Skills required. – Using this regulator is not something I recommend for a novice diver, or any diver for that matter unless they have assistance from a diver who is well experienced in the use of this piece of equipment.

Diving with this old regulator presents risks and requires physical strength, knowledge, and experience. Do not use this regulator unless you thoroughly understand how to use it. Also, have a knowledgeable individual examine the regulator to make sure it works properly and that the interior components are in good condition. Furthermore, you should have an experienced diver assisting you the first time you use this regulator and begin your immersion in water shallow enough so that you can stand up in the event anything goes wrong.

In Part-2, I will share my experience diving with the regulator. Hopefully I will have some underwater photos for you.

Until then, calm seas and please stay safe.

Uncle Ed Zayas

Teaching SCUBA from the heart.

For some who choose the profession of teaching, their craft is the child of a special calling. Teaching for them is not a simple process that transfers knowledge and skills from books and activities onto the mind of a student. Instead, the knowledge passed on through books and other resources is woven with the teacher’s unique personal experiences into lessons that are fun, meaningful, and useful for their students. This is what I have come to understand based on many years spent as a technical certification instructor, public high school teacher, online English teacher, life skills presenter, and most recently SCUBA instructor. It doesn’t matter where, or what subject matter you teach others. It’s the reason why you teach and how you interact with your students which defines the kind of teacher you are.

For some, teaching is chosen as a career and the reason why some teach is to make a living. And there is nothing wrong with that, especially if you enjoy the interaction between with your students. A professional educator knows that teaching or leading is not about yelling or trying to impress your students with your amazing qualifications and skills, but rather about helping your students gain useful knowledge and skills, while building self-confidence and creating an atmosphere where students feel that they matter. Those who accomplish the latter are known to “teach from the heart.” That’s when learning happens at its very best. That’s the kind of teacher many of us want to be.

Through the years I have met and heard of teachers who knew their subject matter extremely well but who treated their students as if they were beneath them and unimportant. These teachers missed out on the opportunity to remember what life looked and felt like when they were young, to observe the awe on a student’s face when they “get it”, and to allow a contagion of youth to flow through their souls. This reciprocal effect makes the whole learning experience inspirational for both teacher and student. Even at my age, my students still help me remember what life looked and felt like when I was young.

A few weeks ago, I read a popular phrase on the LifeWaters.org website that encapsulates this learning experience I am writing about. The phrase says, “It takes a village”. This clearly describes how teaching is done. Teaching is not just about teachers and students in a classroom. There is usually a schoolhouse (brick and mortar or virtual) where we find administrators, career counselors, administrative staff, bus drivers and many more roles in support of teachers and students. Similarly, in our SCUBA industry we have certification agencies, dive shop owners and staff, boat captains, crew members, and other individuals which work together to offer training for those who are interested in a SCUBA certification. And most important, there are students of varying ages and backgrounds who, for a great variety of reasons, want to experience SCUBA.

In September 2021, I had the honor of certifying Caitlin Maitre as an SDI/TDI Open Water SCUBA Diver. Caitlin wants to build her SCUBA skills so she can help disabled individuals experience SCUBA diving. Her husband Alex Maitre also participated in the class. Alex is already certified as an Open Water diver so for him, this was a skills review and an opportunity for additional practical experience, particularly about how to assist a disabled individual in the water. Alex works for the Miami Veterans Administration helping disabled veterans at VA facilities and volunteers in events organized by LifeWaters.org. You can see why I think this was a very special training session for me in helping a bright and good-hearted couple like this. I am very thankful to Caitlin and Alex for sharing their hearts’ vision and purpose in a way that inspired me – they made our short experience together as one I will always remember as “teaching SCUBA from the heart”.

Finally, it does take a village and there are many others who helped make this possible. There was LifeWaters.org of course, and this time there was my friend Peter Friedman who generously provided use of Stuart SCUBA’s classroom, equipment, access to an amazing swimming pool, and a boat with Captain and crew so that Caitlin could experience two amazing boat dives. Peter’s administrative staff at the shop helped me a lot with all the paperwork and whatever we needed during academic training. Thank you, Peter, and thank your entire shop for helping me certify Caitlin as an SDI/TDI SCUBA diver.

With Love,

Uncle Ed

A Beautiful Gem Hidden Under a Little Bridge – Blue Heron SCUBA Diving

Located at Phil Foster Park on Blue Heron Blvd, right under Blue Heron Bridge, you will find one of the best shore dive sites in America. If you decide to SCUBA Dive there, you are very likely to see octopus, barracudas, frogfish, arrow crabs, moray eels, sea horses, angelfish, and many more types of sea life. So let me give you a few pointers to ensure your dive will be a memorable one.

1. Arrive Early

Blue Heron Bridge is a very popular location for SCUBA instruction and recreational diving. If you want to SCUBA Dive there you should arrive at least 3 hours before your planned dive. Why so early? Because many others will plan to be there early enough to find a parking spot – really, it is that popular. The Park is open from sunrise to sunset. There have been times when I arrived there right at sunrise and the park filled up within an hour. But the best time to get there will also depend on the season, time of High Tide, and day of the week.

It’s almost impossible to find parking at BHB during school breaks and holidays. I avoid diving there during these days as the park will fill to capacity very quick.

2. Best Time to Dive

If you are diving, you need to be geared up and in the water 30 minutes before High Tide. This is “slack time”, meaning times when the current flow will likely stop and when visibility should be at its best. No matter how precise the tide tables might me, there is always a chance that there will be a strong current due to factors like heavy rain. And there are times when you may encounter hundreds of jellyfishes in the water, so personally I highly recommend wearing some sort of protective suit – I wear a 3 mil wetsuit. Always be prepared for this and be prepared to call the dive if conditions are not safe.

3. Stay out of the Boat Channel

If you get in the channel there is a very good chance you will be run over by a boat and there is plenty of boat traffic. The channel is clearly marked. This is one reason why use of a dive flag is required. Diving or snorkeling in the channel can easily get you kicked off Blue Heron Bridge.

4. Use a Dive Flag

This is not a “should”, it’s a “MUST”. You can be fined or kicked out of the water by a lifeguard. More important, I have seen boats stop very close to the east bridge – this way they can see that there is a diver below nearby.

5. Facilities

There are 2 bathrooms at Phil Foster Park. One is located close to the entrance to the park on the east side. The other is on the west side near the fishing pier. In my opinion, these are not kept up nicely – at times it’s quite gross. Not a put down, just sharing from my experience having visited the park over 20 times over the past few years.

6. Accessibility

There are handicapped parking places at Blue Heron Bridge. However, if you are on a wheelchair, there is no direct access to the water. The only way to accomplish this would be to perform an assisted carry to the water’s edge or use a wheelchair with wheels thick enough to travel on the sand. If you are a disabled SCUBA Diver and would like to snorkel or dive at Blue Heron Bridge please let me know – I can get a group of buddies to help you.

7. Overall

Even with the dirty bathrooms – Blue Heron Bridge is an amazing place to visit. I hope you will find this article useful and I hope you enjoy the photos I am posting from my visit a few weeks ago. Dive safely!

History of the Rubber Duck

History of the Rubber Duck

Last year, during my Instructor Development Course (IDC), my SDI instructor trainer handed me a rubber duck and said, “Here – make a classroom presentation about it.” I thought, “You have to be kidding me!”. Reluctantly, and following SDI’s format for a classroom presentation, I began to research virtually every aspect of the rubber duck. Much to my surprise, I discovered many interesting and some little-known facts about them.

Piece of Americana

Rubber ducks first appeared in the late 1800s during the Industrial Revolution, making use of Charles Goodyear’s process for rendering rubber into malleable material. For many years these delightful toys have been and, in many cases, continue to be the faithful companions of kids and even some adults in the bathtub and in the shower. The first rubber ducks didn’t even float: they were cast solid and were intended as chewing toys.

Climb to Fam

eIn the 1940s, a Russian-American sculptor named Peter Ganine created a sculpture of a duck. He patented it and reproduced it as a floating toy. Rubber ducks evolved into the iconic floating yellow figure with their bright orange bill we are so familiar with today. Mr. Ganine actually sold over 50 million of them!Rubber ducks began their climb to fame around 1970 when Ernie, the orange Muppet on Sesame Street, first sang “Rubber Duckie” to his best bath buddy. The song rose to number 16 on Billboard’s chart of hit tunes and is still heard decades later. I must confess that it’s still one of my favorites.

Scientific Contribution

In 1992, a shipping crate containing 28,800 plastic rubber ducks was lost at sea when it fell overboard on its way from Hong Kong to the United States. Believe it or not, some are still floating in the ocean today. Some of the ducks have washed up on the shores of Hawaii, Alaska, South America, Australia and the Pacific Northwest; others have been found frozen in Arctic ice. And others have made their way as far as Scotland and Newfoundland in the Atlantic.Today that flotilla of plastic ducks has been being hailed for revolutionizing our understanding of ocean currents, as well as for teaching us a thing or two about plastic pollution in the ocean.

Benefits of the Rubber Duck

Benefits of the rubber duck go far beyond that of being our loyal bath companions. For little kids, rubber ducks naturally inspire water play that helps develop muscle strength and coordination. With their bright colors, smooth texture, and (for some) squeaky sounds, rubber ducks help sharpen toddlers’ senses. And just as important, their presence in the bathtub calms children’s fear of water immersion and makes clean fun of the routine hygiene habits they’re learning.

Collector’s Market

Rubber ducks are often personalized, creating a market for collectors who proudly display variations of the classic form which proclaim their affinity to colleges, careers, sports, celebrities, and even holidays. I named this particular version D-Duck. Can you guess why? As a technical diver I often use a set of “doubles”. In a sense, this little rubber duck is symbolic of good ol’ me.

After observing my Instructor Development Class presentation about the Rubber Duck, Christy kindly presented it to me. D-Duck is now immortalized in this article and most important as a distinguishing feature on my dive flag. If you ever come across it by all means, stop by, say hello and let me know you read the article.

Safe diving!

Reference:Graphic depiction of routes traveled by rubber ducks; From Wikipedia By NordNordWest https://commons.wikimedia.org/w/index.php?curid=3559445

Evaluación de Riesgo para Buceadores – un enfoque holístico para su seguridad.

Evaluación de Riesgo para Buceadores – un enfoque holístico para su seguridad.

Evaluación de riesgo no es disciplina nueva ni muy compleja. En su aplicación más sencilla, es un mecanismo para la protección y sobrevivencia humana, uno que practicamos en todo momento a través de nuestra vida. También es un proceso utilizado en muchas industrias para identificar los riesgos asociados con el funcionamiento diario de empresas, agencias gubernamentales y proyectos o misiones especiales. Mi participación en el análisis de riesgo comenzó a finales de la década de 1980 como miembro de un grupo militar dedicado a la evaluación de sistemas informáticos en instalaciones militares a través del mundo. Más tarde, como contratista civil, apoyé a la NASA en la evaluación y selección de técnicas y aplicaciones computarizadas para facilitar el análisis de riesgo en el Centro de Vuelo Espacial Goddard. Las aplicaciones utilizadas en el análisis de riesgo han evolucionado mucho desde aquel tiempo, pero los conceptos básicos, las teorías y los principios siguen siendo los mismos. En este artículo presentaré cuatro componentes importantes en la evaluación de riesgo, en el contexto de la seguridad de actividades recreativas de buceadores.

El primer componente es un Peligro o Riesgo, el cual podría causar algún tipo de daño si ocurriera. Usemos un simple ejemplo – vamos a cruzar la calle. ¿Cuál es el peligro al que puedes estar expuesto al cruzar la calle? ¡Qué tal si te atropella un vehículo! Y ni siquiera pensemos en los muchos tipos de vehículos que nos pueden atropellar (camión, autobús, automóvil, motocicleta, bicicleta, etc.)

El segundo componente en la evaluación de riesgo es la Pérdida Posible: ¿cuál puede ser la consecuencia en caso de que ocurra este peligro (ser atropellado por un automóvil). La consecuencia de ser atropellado depende de muchos factores como la velocidad del vehículo, las condiciones de la superficie de la carretera, e incluso la edad de la víctima. En algunos casos, la consecuencia puede ser simplemente el costo asociado con la hospitalización y la pérdida de salario, pero en otros puede ser un evento tan catastrófico como la pérdida de vida.

El tercer componente es la Probabilidad de Ocurrencia – ¿cuán probable es que ocurra este peligro? Esto depende de si cruzamos la calle en un paso de peatones o en otro lugar, el volumen de tráfico en tal momento, y la hora del día o de la noche. ¿Cómo está el clima hoy? ¿Está soleado, nublado o llueve? Llevemos esta discusión un paso más allá. ¿Cuál es la edad de las personas que conducen automóviles en la calle que queremos cruzar? ¿Son jóvenes? ¿Son viejos? ¿Cuál es la incidencia de accidentes en ambos grupos? ¿Qué nos dicen los datos demográficos sobre las personas que viven en los alrededores o los que viajan diariamente por aquí? Y, por último, ¿qué nos dicen las estadísticas sobre el número de accidentes que involucran a peatones en esta calle?

El cuarto componente de la evaluación de riesgo se denomina Mitigación. Mitigación significa una serie de cosas que podemos hacer con el fin de reducir la probabilidad de que este riesgo ocurra. En nuestro sencillo escenario podríamos proveer mitigación cruzando en un paso de peatones durante las horas de luz del día y cuando el tráfico sea liviano. También podríamos usar un chaleco reflectivo. Para algunas de estas mitigaciones podríamos asignar un costo monetario. Podemos gastar $20.00 en el chaleco reflectivo para ayudar a disminuir el riesgo o podemos aceptar el riesgo. Si el nivel de riesgo fuera muy alto en un momento determinado, podríamos decidir no cruzar la calle.

En nuestro ejemplo, es un día soleado y el tráfico es muy liviano. Según las estadísticas publicadas, ha habido pocos incidentes involucrando a peatones en este lugar durante el último año. Además, hay muchos pasos de peatones bien marcados, equipados con semáforos y señales de paso de peatones bien iluminadas. Tal parece que podemos cruzar la calle con relativa seguridad.

Ahora tenemos que decidir la mejor manera de expresar las conclusiones derivadas por nuestro análisis de riesgo. Para esto podemos utilizar enfoque cualitativo o cuantitativo. En un enfoque cuantitativo utilizamos un valor numérico para representar la probabilidad de ser golpeado por un vehículo. Utilizaríamos un algoritmo para calcular la probabilidad (resultados favorables / resultados) y a la vez tener en cuenta los muchos elementos discutidos anteriormente como la iluminación, el clima, el volumen de tráfico, el número estadístico de accidentes, donde cruzamos, etc. El enfoque cuantitativo podría manifestarse como “probabilidad del 10%”. En el enfoque cualitativo utilizamos términos como “Bajo”, “Moderado”, “Medio” o “Alto” para describir la probabilidad de ser golpeado. No importa cual método decidamos utilizar, ya tenemos suficiente información para elaborar un plan para reducir el riesgo explicando cómo pensamos contrarrestar los problemas que puedan ocurrir.

Al realizar evaluaciones de riesgo, los ingenieros de seguridad de sistemas de cómputos organizan los peligros en categorías de riesgo estrechamente relacionadas con una industria, negocio u operación. La evaluación de riesgo y las estrategias de mitigación recomendadas son formuladas por individuos con adiestramiento y experiencia específica. Por ejemplo, en el campo de las categorías de riesgo de Tecnologías de la Información (TI) se examinarán los riesgos físicos y ambientales asociados con un sistema informático o instalación (inundación, terremotos, pérdida de energía, incendio, etc.) Los riesgos físicos de una instalación son muy diferentes a amenazas al sistema operativo o software de aplicación de una plataforma informática (introducción de virus informáticos y otro software malicioso) y requieren cuidadosa consideración por parte de expertos en cada una de estas disciplinas.

Ahora que hemos establecido esquema para el análisis de riesgo, comencemos a definir categorías de riesgo asociadas con el buceo. Permítanme enfatizar que la intención de este artículo no es capacitar o adiestrar a la audiencia sobre los muchos tipos de accidentes que pueden ocurrir, o qué debemos hacer (Primeros Auxilios / RCP) cuando se producen lesiones y problemas mientras se bucea – ese es el objetivo de entrenamiento “Rescue Diver”. En vez, deseo construir una asociación lógica de categorías de percances para ayudarnos a aplicar estrategias de mitigación simples y de sentido común que nos ayuden a reducir el riesgo para aquellos que participan en el buceo deportivo. ¿Puede todo este esfuerzo asegurar que nunca sufriremos un percance al bucear? Por supuesto que no, pero adoptar un plan de mitigación sin duda puede reducir el nivel de riesgo, y al mismo tiempo ayudarnos a ser mejores buceadores.

Sin duda hay varias formas de categorizar el riesgo en el buceo SCUBA. He ideado cinco categorías que incluyen los peligros submarinos, la vida marina, barotraumatismo, fallo del equipo y la toxicidad como punto de partida a lo que espero se convierta en un intercambio de ideas cordial y positivo.

1. PELIGROS SUBMARINOS.

Los peligros submarinos pueden estar presentes en cualquier lugar donde vayamos a bucear, pero son de mayor preocupación al entrar o salir del agua a orillas en la costa. Estos peligros son únicos en cada lugar. Lo que parece ser linda playa arenosa desde la orilla puede cambiar rápidamente y convertirse en una superficie irregular o rocosa con coral, aparejos de pesca, vidrio roto y otros objetos afilados, vida marina potencialmente peligrosa y muchos más peligros los cuales pueden ser difíciles de ver en agua turbia. Oleaje alto puede añadir un nivel sustancial de dificultad al entrar y salir del agua también.

Los peligros submarinos existen en todas partes. Yo he encontrado línea de pesca, anzuelos y otros aparejos en el fondo del océano en muchos lugares donde frecuento bucear. Mi adiestramiento como buzo comenzó en el 1990 mientras estaba asignado a una unidad militar en Okinawa, Japón. Allí recuerdo ocasionalmente encontrar municiones sin detonar mientras buceaba en la costa de la isla. Si alguna vez encuentras algún tipo de munición sin detonar, no toques ni trates de manejarla de ninguna manera. Asegúrate de reportar su hallazgo a la guarda costera o policía.

Estrategias de mitigación (peligros submarinos)

a. Busca tanta información como te sea posible sobre el sitio donde vas a bucear con anticipación. Observa y evalúa las condiciones climáticas y del mar cuando llegues al punto de entrada. La presencia de corrientes e información de marea puede ayudarte a determinar el nivel de riesgo asociado con la actividad que planeas. Es posible hallar información específica sobre cualquier lugar de buceo haciendo preguntas en foros de SCUBA en línea. También puedes pedir información en negocios de buceo (dive shops) locales.

b. Limita la cantidad de equipo que llevas, como cámaras, lanzas, redes, etc.

c. Usa botas de suela dura al hacer entrada desde la costa, y camina arrastrando los pies. La vibración causada por este movimiento puede alertar a la vida marina de tu proximidad, avisándoles que se salgan de tu camino antes de que los pises.

d. En oleaje liviano, entra al agua con todo tu equipo puesto y ajustado y asegurándote de que tu BCD esté inflado. Tan pronto el nivel del agua llegue ligeramente sobre tu cintura, pon el regulador de segunda etapa (second stage) en tu boca, ponte las aletas y asume posición horizontal sobre el agua, disminuyendo la posibilidad de pisar algún peligro submarino y evitando que te golpees o resbales al caminar sobre las rocas.

e. Durante condiciones tranquilas y en aguas cristalinas, es buena idea usar un snorkel durante tu entrada desde la costa. Piensa en todo el aire que ahorrarás a medida que abras camino al punto de descenso en aguas más profundas – aire que puedes utilizar para disfrutar de tu inmersión un poco más de tiempo. Si el oleaje esta fuerte, entonces debes ponerte las aletas antes de entrar al agua o salir de ella, caminando de lado o mirando hacia atrás mientras te aferras a tu compañero de buceo.

f. Ajusta tu equipo – asegúrate de que piezas como tu octo, calibrador o computadora no cuelguen.

g. Lleva un cuchillo/herramienta de buceo u otro dispositivo para cortar material de enredo.
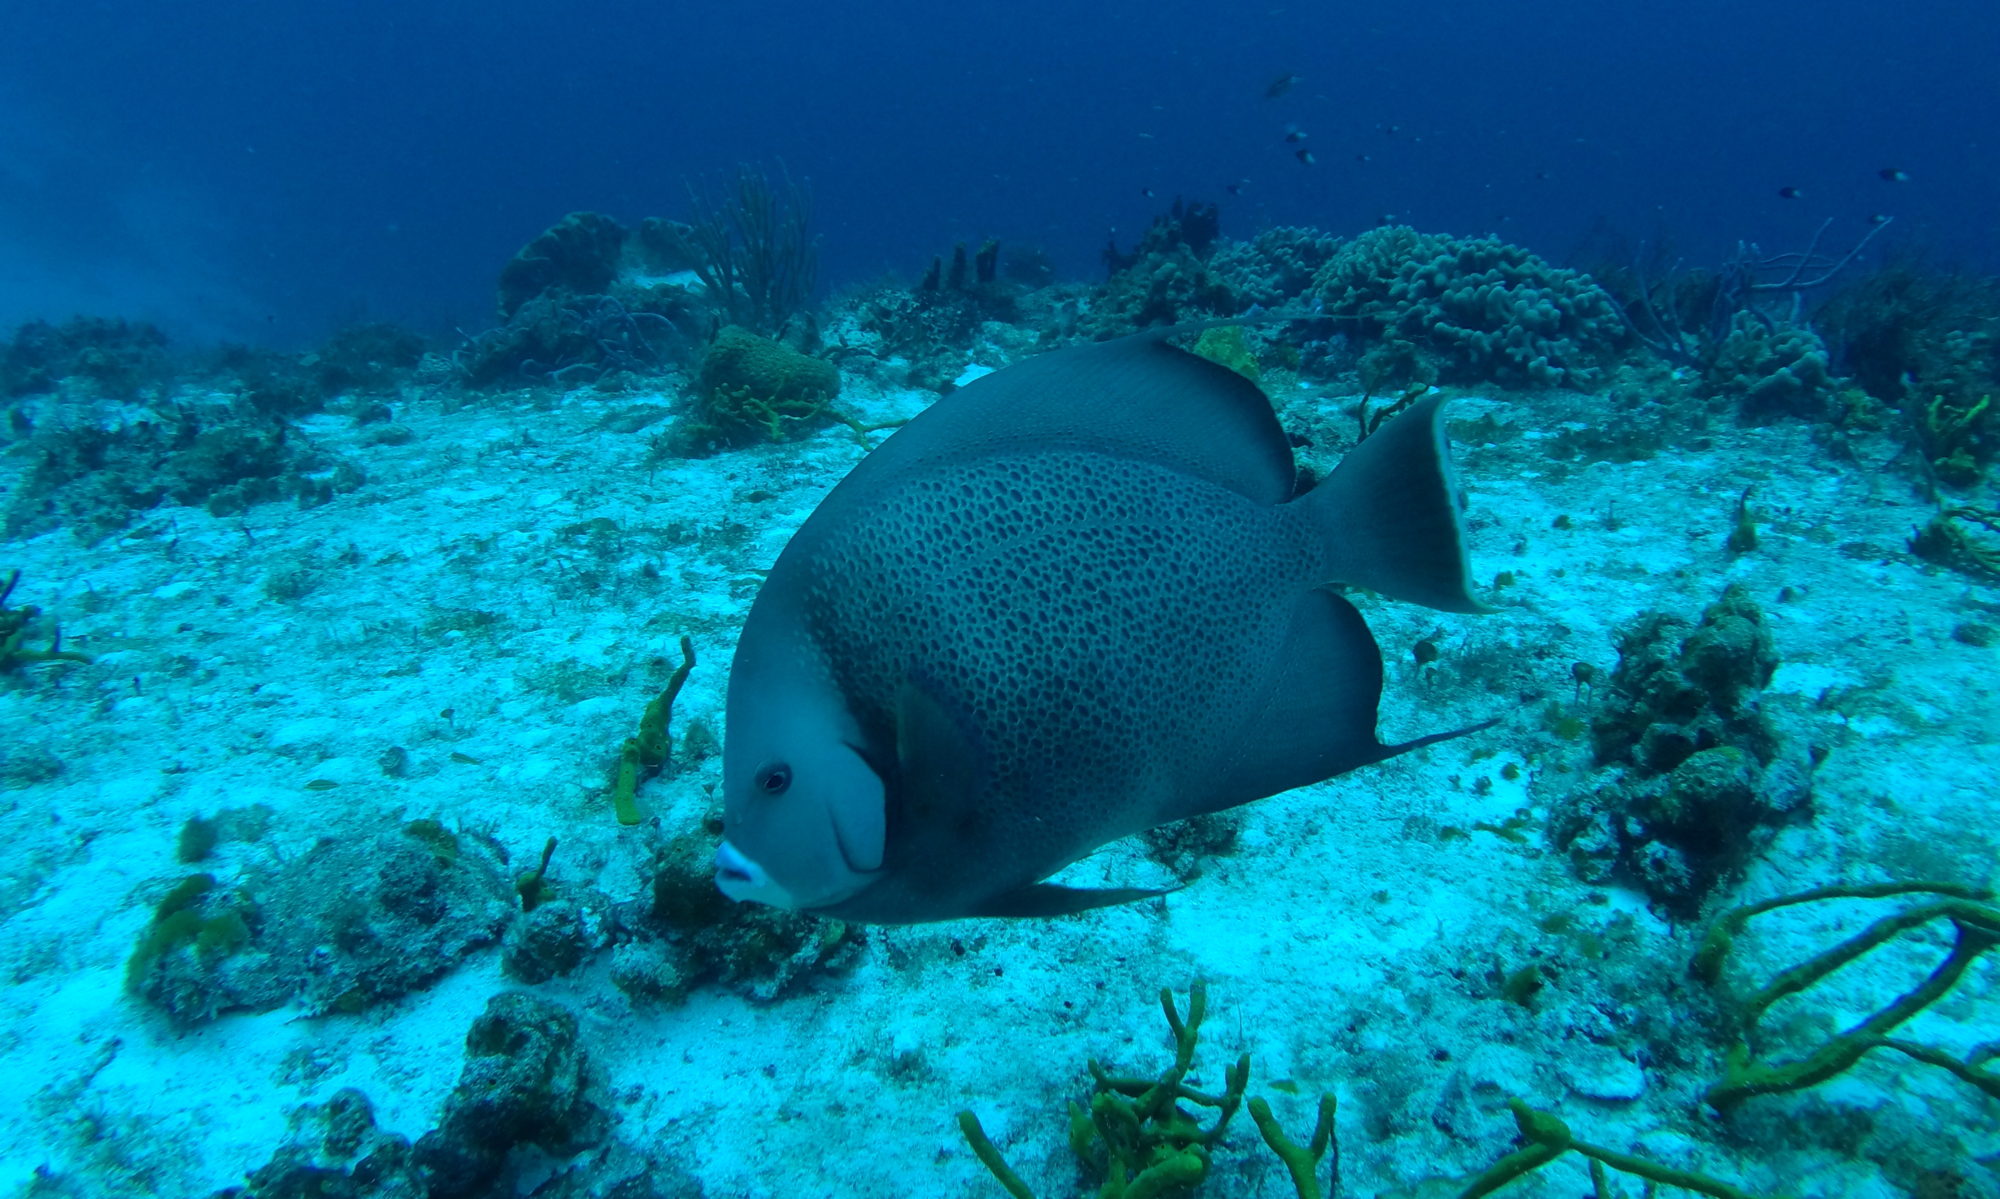
2. VIDA MARINA.

Una de las razones por las que buceo es que me fascina observar la vida marina en su hábitat. Como buceador profesional, apasionado por la conservación del medio ambiente y la vida marina, practico algunas reglas importantes al acercarme a toda la vida marina para minimizar el riesgo de daño para ellos y para mí mismo. La mayoría de las lesiones relacionadas con vida marina provienen de la respuesta natural del animal a una amenaza percibida, un mecanismo de defensa simple para su preservación. Tales ataques y lesiones son una respuesta a algo que hemos hecho a propósito o accidentalmente.

Mueve un dedo delante de una anguila morena y descubrirás lo cruel y dolorosa que puede ser su mordida. Ah, pero la tortuga parecía tan amigable – no pensé sucediera algo malo al poner mi mano frente a ella. Bueno, la linda tortuga puede remover fácilmente tus dedos (ya que parecen gusanitos) con precisión quirúrgica. A pesar de todo el entrenamiento y buenos consejos de peritos e instructores de buceo, algunas personas parecen perder todo sentido de la razón al bucear y terminan lesionándose.

No todas las lesiones de la vida marina son el resultado de provocación. De hecho, los ataques por la vida marina son raros, y también pueden ocurrir al tocar inadvertidamente a un animal u organismo. Ejemplos de contacto físico no intencional con la vida marina son contacto con tentáculos de medusas, pisar un erizo, pez piedra o mantarraya, o chocar con un pez escorpión, ya que todos estos pueden ser difíciles de detectar. También podríamos obtener cortes y rasguños del coral.

Los animales marinos también pueden ser curiosos. Hace unos meses un hermoso tiburón limón me siguió a la superficie después de una inmersión hecha en grupo para observar una embarcación naufragada, llegando a menos de 4 pies de mí. Me quedé suspendido en la columna de agua mientras completaba mi parada de seguridad de 3 minutos hipnotizado por la belleza de este animal. El tiburón estaba tan cerca que podría haber nadado hacia él y tocarlo. ¿Por qué no lo hice? Como dije anteriormente, una parte importante de mi ética de buceo es “respetar toda la vida marina”. A pesar de que no toqué al tiburón, el recuerdo de ese momento tan especial permanece vivo en mi memoria. Más importante, viví ese momento sin causarle daño al tiburón ni a mí mismo.

Estrategias de mitigación (vida marina)

a. La forma más efectiva de minimizar el riesgo de ser herido por vida marina es tratar a todas las criaturas con respeto. No es correcto acosar a ningún animal – debes mantener tu distancia y tus manos cerca de tu cuerpo, o mejor aún, en tu cámara para que podamos disfrutar de tus fotos o vídeo.

b. Desarrolla y practica buenas habilidades de flotabilidad – no toques el fondo.

c. Usa protección adecuada para tus pies y piel que sea consistente con la temperatura del agua y el medio ambiente.

d. Siempre mantente alerta y consciente de tu alrededor, 360 grados horizontalmente, debajo y sobre ti. Sé de una dama que tomaba fotos flotando sobre un bello arrecife marino, cuando inesperadamente, un joven buzo aterrizó sobre su espalda a profundidad, empujándola hacia el fondo y ocasionando que aterrizara sobre un erizo. No importa cuántas precauciones pongamos en efecto para nuestra seguridad, siempre existe la posibilidad de un accidente.

Algunas recomendaciones relacionadas con la caza bajo el agua.

e. El manejo de lanzas en un bote de buceo durante la entrada al agua y a la salida presentan un mayor nivel de riesgo. Toma tu lanza en la parte trasera del barco antes de entrar al agua con las bandas deshechas y su seguridad puesta hasta que estés bajo el agua y listo para disparar. Al regresar al bote, entrega tu arpón o lanza al divemaster o tripulación del barco con las bandas deshechas y su seguridad puesta antes de subir de nuevo. Aunque esté descargada, nunca apuntes tu arpón o lanza a nadie.

f. Los tiburones serán atraídos por algo más que el olor de sangre: el sonido hecho cuando se libera el arpón también los atraerá.

g. No importa lo que caces, como por ejemplo un pez león, aún puede herirte después de tu regreso al barco. Coloca tu captura en un recipiente apropiado para garantizar tu seguridad y la de tus compañeros de buceo.

Otros comentarios y recomendaciones adicionales los dejo a los expertos en caza marina.

3. Barotraumatismo.

Barotraumatismo se refiere a lesiones en el cuerpo humano debido a cambios de presión en diferentes compartimentos del cuerpo. Ejemplos de esto son enfermedades de descompresión incluyendo enfermedad de descompresión (DCS) o “the bends”, embolismo de gas arterial (AGE) y otros tipos de lesiones de expansión pulmonar como enfisema Mediastinal, Subcutánea o Neumotórax. Estos son algunos de los riesgos más graves asociados con el buceo. Tenemos que estar conscientes de las causas que conducen a estos eventos y desarrollar tanto disciplinas de buceo como estilos de vida que minimicen el riesgo de que nos sucedan estas lesiones.

Los exprimidos de cavidad corporal (orejas, cavidades sinusales, dientes, máscara y traje de neopreno) también están relacionados con el barotraumatismo. El apretón ocurre en espacios de aire desigual en nuestros cuerpos como el oído medio, cavidades sinusales o dientes. Estos problemas pueden convertirse rápidamente en una emergencia bajo el agua con consecuencias que varían desde un malestar leve a un dolor insoportable y hasta causando daño a nuestros tímpanos o dientes. Un apretón también puede ocurrir en el espacio de aire dentro de la máscara, la capucha y el traje de neopreno, ya que el aire dentro de estos se comprime durante el descenso. Un apretón de máscara ocurre cuando no exhalamos a través de nuestra nariz en la máscara durante nuestro descenso. En el caso de los dientes, los espacios de gas debajo de una cavidad o relleno se comprimirán durante el descenso con el potencial de implosionar, y explotar al ascender a medida que los gases se expanden. Como puedes imaginar, esto podría ser muy doloroso.

Estrategias de mitigación (Barotraumatismo)

Las siguientes son recomendaciones generales/de estilo de vida para ayudarnos a disminuir la probabilidad de sufrir un episodio de barotraumatismo.

a. Deja de fumar o vapear – esta es una decisión clara que debes tomar, una que nadie más puede hacer por ti además de apoyarte. Sí, entiendo perfectamente lo difícil que puede ser dejar de fumar. Dejé de fumar hace 15 años.

b. Haz ejercicio regularmente. Camina, o corre en bicicleta dos veces al día. Tu nivel de ejercicio depende de tu edad y del nivel de acondicionamiento físico existente. Siempre busca consejo con tu médico antes de participar en un programa de acondicionamiento físico.

c. Observar una dieta saludable. Sé amable con tu cuerpo haciendo buenas decisiones sobre lo que comes.

d. La hidratación es muy importante. No sólo en preparación para una inmersión, sino como parte de su rutina diaria. Los tejidos y órganos de nuestro cuerpo necesitan agua para funcionar correctamente, para eliminar toxinas / impurezas, y lubricar las articulaciones. La cantidad de agua que necesitas para mantenerte hidratado depende del clima, tu nivel de actividad y condición física, e incluso tu edad. Como regla general, debes beber al menos de 6 a 8 vasos de agua todos los días. Si no practicas buenos hábitos de hidratación, comienza a hidratarte el día antes de tu inmersión, no esperes hasta el último minuto.

e. Cuida tus encías y dientes. Visita a tu dentista y asegúrate de que tu boca esté libre de caries.

Las siguientes estrategias de mitigación son de naturaleza más específica.

f. No bucees cuando tengas obstrucción o congestión de resfriado, pecho, nasal o sinusal.

g. Planifica tu inmersión y bucea tu plan. En el momento de tu inmersión puede realizar modificaciones de última hora teniendo en cuenta la visibilidad, las corrientes oceánicas y las condiciones climáticas.

h. Analiza tu mezcla de gas para asegurarte de que es lo que planeas respirar durante tu inmersión. Decirle a tu computadora de buceo qué mezcla planeas usar no ha de cambiar mágicamente la mezcla en tus tanques.

i. Apégate a los límites de tiempo a profundidad y duración establecidos por tu computadora de buceo y tablas de buceo para la mezcla de gases que planeas respirar y no excedas estos límites. Cuando te sea posible disminuye un poco tu tiempo a profundidad, y toma más tiempo durante tu ascenso – se conservador. Ese naufragio, arrecife o cueva estará allí mañana … y al día siguiente también para que puedas regresar y explorarlo de nuevo.

j. Cuidado con la velocidad de tu ascenso. La mayoría de las computadoras de buceo te darán una indicación visual cuando estés ascendiendo demasiado rápido. Si te encuentras sin computadora de buceo recuerda no ascender más rápido que las burbujas más lentas a tu alrededor. La velocidad recomendada no debe exceder los 30 pies por minuto.

k. Haz una parada de seguridad. Al final de cada inmersión (sin incluir inmersiones de entrenamiento en aguas poco profundas) debes detenerte a una profundidad de entre 15-20 pies durante un período de 3 a 5 minutos. Esto no es una parada de descompresión, sino un paso de mitigación importante para ayudar a reducir el riesgo de contraer enfermedad de descompresión (DCS). No recomiendo que hagas la parada de seguridad a una profundidad de menos de 15 pies. La razón es que a veces, la diferencia entre la base y cúpula de las olas puede ser sustancial, cambiando rápidamente tu nivel de presión ambiental. Recuerda que los mayores cambios en la presión ocurren en la parte superior de la columna de agua. Además, tan cerca de la superficie estarás en mayor riesgo del tráfico de barcos, incluso cuando hayas desplegado una boya de seguridad.

l. No te bañes con agua caliente después de bucear ni tampoco entres al jacuzzi. Esto subirá el riesgo de sufrir enfermedad de descompresión.

Las siguientes estrategias de mitigación abordan problemas relacionados con las compresiones.

m. Durante el descenso, no esperes hasta que sientas dolor para empezar a igualar tus oídos. Siempre comienza a igualar en la superficie antes de comenzar tu descenso en la columna de agua. Utiliza la técnica que mejor se adapte a tus necesidades. Yo uso una aplicación suave de la maniobra de Valsalva y movimiento horizontal de mis mandíbulas.

n. Exhala a través de tu nariz durante el descenso y durante toda la inmersión.

o. Tira suavemente de las esquinas de tu capucha para permitir que el agua circule durante el descenso.

4. FALLO DEL EQUIPO.

Voy a definir dos categorías de peligro asociadas con el fallo del equipo. El primero se refiere a los peligros asociados con el ajuste inadecuado del equipo de buceo incluyendo botines, aletas, trajes de neopreno y trajes secos, capuchas, máscara y guantes. Por ejemplo, las aletas que se usan muy apretadas pueden ampollar tu piel, mientras que una aleta suelta requerirá mucho más esfuerzo y puede desprenderse. También debes ajustar tu máscara para que no esté demasiado apretada sobre tu cara, de forma que puedas exhalar a través de la nariz durante tu inmersión para aliviar la presión, para ajustarla si es necesario, y para remover el agua. Un sello hermético en la capucha o sello alrededor del cuello puede reducir tu circulación sanguínea o presión arterial, resultando en mareo y aun peor, que provoque un desmayo y que te ahogues.

El segundo tipo de equipo incluye computadoras de buceo, infladores de flotabilidad, tanques, válvulas, colectores, bandas, primera etapa, segunda etapa, octo y situaciones que se te acabe el aire bajo el agua.

Estrategias de mitigación (fallo del equipo)

a. Asegúrate de que tu equipo este ajustado correcta y cómodamente. Prefiero comprar equipo de buceo en una tienda de buceo. Siempre hay alguien allí para ayudarme a elegir el equipo que se adapte correctamente a mi cuerpo. Otros artículos los puedo comprar fácilmente en línea, pero cuando se trata de trajes de neopreno, máscara, aletas, capuchas y guantes prefiero probarlos en persona para asegurarme de que encajan correctamente.

b. Los tanques SCUBA requieren una inspección visual (VI) una vez al año y una prueba hidrostática cada cinco años. Por lo general, una tienda de buceo comprobará la fecha de tu último VI cada vez que traigas un tanque para que lo rellenes. La fecha del último VI de tu tanque se perfora en una etiqueta adhesiva que lleva el nombre de la tienda de buceo que realizó la inspección. Cuando se realiza una prueba hidrostática, la fecha de la prueba se estampa en el tanque como recordatorio visual.

c. Cuando traes un tanque para un VI, la mayoría de las tiendas de buceo también limpiarán la válvula del tanque. Pídele a tu tienda de buceo que se asegure de que esto se haga al mismo tiempo que tu tanque se someta a su VI.

d. Apoya a una tienda de buceo local. Encuentra una tienda de buceo y desarrolla una buena relación con ellos. Trae tu equipo y pregúnteles cuándo debe ser reparado u hora de darle servicio. Cada compañía establece su propia frecuencia para chequeo de función e inspección. Debes tomar en cuenta la frecuencia con la que utilizas tu equipo. Yo prefiero que mi BC se inspeccione una vez al año y mi primera etapa, segunda etapa y octo cada dos años.

e. Cuida tu equipo – te sorprenderá cuánto más tiempo durará tu equipo simplemente enjuagándolo con agua fresca después de cada inmersión y permitiendo que se seque antes de guardarlo. Llena la vejiga de tu BC con agua fresca, sopla aire en ella y remueve el agua salada o agua de piscina de ella dos o tres veces. Una vez que hayas hecho esto, llena el BC con aire antes de guardarlo. ¡No permitas que el agua entre en la primera etapa de tu regulador!

f. Comprueba la carga de la batería en tu computadora de buceo antes y después de cada inmersión. Yo reemplazo mi batería cada vez que alcanza el 50% de carga.

g. Si usas tanques dobles, chequea y limpia tus válvulas y el colector (manifold) cada vez que hagan inspección visual (VI) a tus tanques.

h. NUNCA levantes tus tanques dobles usando el colector como soporte. Si estas buceando en un barco transporta tus dobles al barco tú mismo y llévatelos de la misma manera. Pídele a la tripulación que use las válvulas para levantar los tanques y no el colector. Yo utilizo tanques HP 100 en mi plataforma doble y pocos miembros de la tripulación desean levantarlos.

i. Recuerda que los kits de servicio para tu equipo no estarán disponibles por siempre. Si traes una primera etapa, segunda etapa u octo a una tienda de buceo para ser reparada y el equipo tiene 10-15 años, hay una buena probabilidad de que los kits de servicio ya no estén disponibles. Y trata de no traer tu equipo para ser reparado una semana antes de que lo necesites. Los kits de servicio pueden tardar unos días y a veces más tiempo para conseguir, y es posible que tengas que llevar tu equipo tal como está (no lo recomiendo) o alquilar un set de una tienda de buceo.

j. Comienza a monitorear tu suministro de aire antes de entrar al agua, tan pronto como llegues al fondo y regularmente durante tu inmersión. Pregúntale a tu compañero de buceo de vez en cuando cuánto aire le queda. Comienza tu ascenso asegurándote de que habrá suficiente aire en tu tanque para ti y tu compañero en caso de emergencia, y para completar 3 minutos en parada de seguridad, inflar tu boya de seguridad y permanecer en el agua con tu regulador en la boca hasta que subas al barco. Planea regresar a tu barco y completar tu inmersión con una presión de por lo menos 500 PSI en tu tanque.

5. Toxicidad.

TOXICIDAD DE OXÍGENO

La toxicidad de oxígeno representa un mayor riesgo para los buceadores que usan Nitrox. En el buceo SCUBA, toxicidad es la medida a que un gas es venenoso para el cuerpo humano. Dos tipos de toxicidad por oxígeno ocurren. Uno ataca al sistema nervioso central (SNC) y otro al pulmonar. La toxicidad pulmonar por oxígeno es causada por la exposición a presiones parciales elevadas de oxígeno durante largos períodos de tiempo. Esto se conoce como exposición a dosis de tiempo y se asocia principalmente con buceo técnico y exposición en inmersiones muy prolongadas.

La toxicidad pulmonar por oxígeno no es de tanta preocupación en las actividades recreativas de buceo donde se utiliza Nitrox. La razón de esto son tiempos de exposición más cortos cuando se siguen las pautas de “Sin límite de descompresión” (NDL), junto con la adherencia típica a los intervalos de superficie recomendados.

La toxicidad de oxígeno al Sistema Nervioso Central es algo por lo cual los buceadores recreativos se deben preocupar, ya que respirando oxígeno a una presión parcial elevada puede afectar el sistema nervioso central (SNC). Un efecto de toxicidad por oxígeno del SNC son convulsiones. Cuando un buzo convulsiona bajo el agua, puede perder su regulador, y posiblemente ahogarse.

Al planificar nuestra profundidad de buceo debemos observar los límites de profundidad máxima (MOD), y bucear de forma conservadora, podemos disminuir sustancialmente este riesgo.

Estrategias de mitigación (toxicidad por oxígeno)

Este artículo está escrito con el buceador recreativo en mente. Para el propósito de esta evaluación me centraré en aquellos buceadores recreativos que utilizan Enriched Air Nitrox (EAN). No hago ninguna recomendación sobre mezclas de gas o paradas de descompresión. En su lugar, discutiré la importancia de adherirte a la profundidad máxima de funcionamiento (MOD) o profundidad a la que la presión parcial de oxígeno en una mezcla EANx específica supera su límite aceptable.

Supongamos que estamos usando una mezcla EAN34 durante nuestra inmersión. Primero, ¿cómo sabemos que el gas en nuestro tanque tiene una mezcla de 34% de oxígeno? ¿Porque la tienda de buceo puso una etiqueta en el tanque que dice 34%? Yo lleno mis tanques en una tienda de buceo de muy buena reputación, pero tomo el buceo muy en serio así que analizo el contenido de mis tanques al recogerlos para verificar mi mezcla. Una tienda de buceo de buena reputación mantendrá un cuaderno de jornal donde los clientes escriben el resultado de su análisis.

¿Cuál es la profundidad máxima de funcionamiento para EAN34? Podemos utilizar una de las muchas aplicaciones en nuestro teléfono para calcular el MOD, pero debemos saber cómo calcular esto sin la ayuda de un dispositivo electrónico. La fórmula es muy simple.

((Presión parcial máxima de oxígeno / porcentaje de oxígeno en el tanque) – 1) x 33 pies

La mayoría de las organizaciones involucradas en el buceo SCUBA recomiendan usar 1.4 ATA como límite para la presión parcial de oxígeno (PpO2) por lo que nuestra fórmula va a tener este aspecto:

                                                  MOD ((1.4 ata / .34 ata) – 1) x 33 pies

Ahora hagamos los cálculos: MOD ((4.12)-1) x 33) = 3.12 x 33 = 103 pies

En este ejemplo, la profundidad de funcionamiento máxima usando mezcla EAN34 es de 103 pies.

a. Analiza tu mezcla de gas para asegurarte de que es lo que planeas respirar durante tu inmersión. No importa lo que diga la etiqueta en los tanques: se un buceador responsable y analiza tu propia mezcla de gas.

b. En función de la mezcla EANx analizada, calcula su MOD.

c. Asegúrate de que tu compañero de buceo conoce tu MOD planeado.

d. Comprueba tu profundidad de vez en cuando durante la inmersión y adhiérete a tu MOD. Si estás dispuesto a aceptar el riesgo de calcular tu MOD usando un PpO2 máximo superior a 1.4 (como la contingencia generalmente aceptada 1.6) entonces debes estar preparado para aceptar la consecuencia de tu decisión.

TOXICIDAD DE MONOXIDO DE CARBONO

La intoxicación por monóxido de carbono (CO) ha herido y ha tomado la vida de muchas personas en todo el mundo. Este gas no tiene color, olor ni sabor. En 1974, mientras estaba destacado en Seúl, Corea recuerdo la noticia de la muerte de un compañero soldado debido a la intoxicación por monóxido de carbono. Él había decidido pasar la noche con su novia en el poblado local. El sistema de calefacción de la casa se basaba en cilindros de carbón colocados debajo de las casas. Durante la noche, monóxido de carbono se escapó a través del suelo en el dormitorio. El soldado y su novia murieron mientras dormían.

La intoxicación por monóxido de carbono es un tema de gran preocupación en la industria del buceo SCUBA. El mayor problema con el monóxido de carbono es que se une a la hemoglobina en nuestra sangre de forma más fácil que el oxígeno a nivel molecular, evitando que el oxígeno atraviese a través del sistema sanguíneo a nuestros órganos y tejidos vitales. El CO puede llegar a tuss tanques SCUBA a través de un compresor mal mantenido o por colocación inadecuada de su ingesta.

Estrategias de mitigación (toxicidad por monóxido de carbono)

a. Llena tus tanques en una tienda de buceo de buena reputación, por técnicos calificados.

b. Aunque el monóxido de carbono es inodoro, el gas se introduce a menudo con otros contaminantes que podrían tener olor. Un ejemplo es el olor a escape de automóvil. A medida que compruebes tu equipo en preparación para una inmersión, deja escapar pequeña cantidad de aire a través de la segunda etapa del regulador y huele su contenido. Si hay algún olor no uses el tanque.

c. Si durante una inmersión experimentas síntomas como mareo, dolor de cabeza, náusea o vómitos, dificultad al respirar o visión borrosa, debes terminar su inmersión inmediatamente. Hay una gran probabilidad de que ya estás sufriendo los efectos del monóxido de carbono.

Ahora que hemos establecido una fundación bastante completa para mitigar los riesgos asociados con el buceo SCUBA, decidamos cuál será nuestro plan para reducir riesgo “Risk Management Plan o RMP” y para convertirnos en buceadores autosuficientes. Nuestra estrategia podría consistir en cuidar mejor de nuestro cuerpo practicando buenos hábitos alimenticios o haciendo ejercicio.

Otro componente de nuestro RMP debe ser entrenamiento. Recomiendo que te inscribas en un curso de “Rescue Diver”. Hay muchos buenos proveedores – yo estoy muy contento con los conocimientos y habilidades aprendidas a través del curso “Rescue Diver” provisto por SDI / TDI.

¡Hay mucho más que explorar y discutir con respecto a la evaluación de riesgos en la industria del buceo SCUBA! Los riesgos asociados con la operación de barcos de buceo y en tiendas de buceo donde se proporcionan recargas de gas, venta y reparación de equipo, y donde se llevan a cabo clases de SCUBA. Estas son diferentes y más complejos.

Espero con interés explorar y escribir más artículos sobre este importante tema. ¡Hasta que nos volvamos a ver, bucea con seguridad!

Risk Assessment for SCUBA Divers – a holistic approach to diving safety.

Assessing risk is neither new nor a very complex discipline. In its simplest application, it is a lifelong mechanism for human protection and survival – one we practice every moment of our lives. It is also a process used in many industries to identify the risks associated with the daily operation of businesses, government agencies, and special projects or missions. My involvement with risk analysis began in the late 1980’s as a member of a military group engaged in the evaluation of computer systems at military and defense contractor facilities throughout the world. Later on, as a civilian contractor, I supported NASA in the evaluation and selection of automated tools and applications to facilitate risk analysis at the Goddard Space Flight Center. The tools used in risk analysis have evolved a lot since that time but the basic concepts, theories, and principles are still the same. In this article I will introduce four major components in risk assessment, in the context of recreational diver safety.

The first component is a Hazard or Risk, which could cause some type of harm by its occurrence. Let’s use a simple example – we are going to cross a street. What is a potential hazard we are exposed to when crossing a street? How about getting hit by a vehicle! And for the sake of simplicity, let’s not even think about the many types of vehicles we can get struck by (truck, bus, car, motorcycle, bicycle, etc.)

The second component of risk assessment is Possible Loss – what could the consequence be should this hazard (getting hit by a car) occur. The consequence of getting struck by a car depends on many factors such as the speed of the vehicle, road surface conditions, and even the victim’s age. In some instances the consequence may be the cost associated with hospitalization and lost wages but in some instances the result could be loss of life, a catastrophic event indeed.

The third component is the Probability of Occurrence – how likely is this hazard to occur? This depends on whether we cross the street at a crosswalk or elsewhere, the volume of traffic at the time, and time of day or night. What’s the weather like today – is it sunny, foggy or raining? Let’s take it a step further. What are the age groups of individuals driving the cars on our particular road? Are they young? Are they old? What is the documented incidence of accidents in both groups? What do demographics tell us about people who live in the vicinity or those who commute on this road? And finally, what do statistics tell us about the number of accidents involving pedestrians in on this road.

The fourth component of risk assessment is called Mitigation. Mitigation means a range of things we can do in order to minimize the likelihood of this hazard occurring. In our simple scenario we could provide a level of mitigation by crossing at a crosswalk during daylight hours and when traffic is not heavy. We could also wear a reflective vest. For some of these mitigations we could assign a monetary cost. We can decide to spend $20.00 on the reflective vest to help minimize risk or we can simply accept the level of risk. If the level of risk was higher at a particular time we could simply decide not to cross the street.

For the sake of our example, it happens to be a sunny day and traffic is very light. According to statistics published by law enforcement, there have been few incidents involving pedestrians at this location in the past year. Also, there are many well marked crosswalks equipped with traffic lights and well-lit pedestrian crossing signs. Based on these facts it appears that we can cross the street in relative safety.

Now we need to decide how to best summarize the conclusions derived from our analysis of risk. For this we can use a qualitative or quantitative approach. In a quantitative approach we use a numerical value to represent the probability of being struck by a vehicle. We would use an algorithm to calculate probability (# outcomes favorable / # outcomes) and take into account the many elements addressed previously like illumination, weather, volume of traffic, statistical number of accidents, where we cross, etc. It could look like this “10% probability.” In the qualitative approach we use terms like “Low”, “Moderate”, “Medium”, or “High” to describe the probability of getting hit by a vehicle. Regardless of which method is used, we now have sufficient information to put together a risk management plan to articulate how we plan to address all the potential problems which may arise from all the identified hazards and their probable occurrence.

When performing risk assessments, system security engineers organize hazards in closely related risk categories for a specific industry, business or operation. The evaluation of risk and recommended mitigation strategies should be performed by individuals with specific skills and experience. For example, in the field of Information Technology (IT) risk categories will address the physical and environmental risks associated with a computer system or facility (flooding, earthquakes, loss of power, fire, etc.) Physical risks to a facility are quite different from threats to a computing platform’s operating system or application software (introduction of computer viruses and other malicious software) and require careful consideration by experts in each respective discipline.

Now that we have laid out a foundation for risk analysis, let’s start defining categories of risk associated with SCUBA diving. Let me emphasize that the intent of this article is not to train the audience on the many types of accidents that can occur, or what to do (First Aid / CPR) when injuries and problems occur while SCUBA diving – that is the objective of Rescue Diver training. Instead, I would like to build a logical association of mishap categories to help us apply simple, common sense, mitigation strategies to reduce the risk for individuals engaged in SCUBA diving. Can all of this effort ensure that we will never suffer a mishap when diving? Of course not, but embracing a mitigation plan can certainly reduce the level of risk, and at the same time help us become better divers.

No doubt there are several ways of categorizing risk in SCUBA diving. I have come up with five categories that include underwater hazards, marine life, barotrauma, equipment failure and toxicity as a starting point to what I hope will become a positive exchange of ideas.

1. UNDERWATER HAZARDS.

Underwater Hazards may be present anywhere we dive but are of greatest concern when entering or exiting the water from shore. These hazards are unique to each site. What may look like a sandy beach from shore can quickly change to an uneven or rocky surface with coral, fishing tackle, broken glass and other sharp objects, potentially harmful marine life and many more hazards present which may be difficult to spot if the water is murky. Heavy surf can add a substantial level of difficulty when entering and exiting the water as well.

Underwater hazards exist everywhere. I have come across fishing line, hooks and other tackle at the bottom of the ocean at many dive sites. I began SCUBA diving back in 1990 while stationed in Okinawa, Japan and remember occasionally coming across unexploded ordinance while diving off the island’s coast. If you ever come across any type of unexploded ordinance do not touch or try to handle it in any way. Make sure to report your finding to law enforcement.

Mitigation Strategies (Underwater Hazards

a. Find out as much information about the dive site in advance. Observe and evaluate the ocean and weather conditions when you arrive at the entry point. The presence of rip currents and tide information may help you determine the level of risk associated with your dive. You can find out information specific to a dive site by asking questions in online SCUBA forums. You can ask local dive shops for information as well.

b. Minimize the amount of equipment you are carrying such as cameras, spears, nets, etc.

c. Wear hard sole booties when making a shore entry, and walk in using a shuffling motion with your feet. The vibration caused by this movement should alert sea life of one’s proximity, alerting them to move out of the way before you step on them.

d. In light surf, get in the water with all your equipment on making sure your BCD is inflated. As soon the water level is slightly above your waist, put your second stage in your mouth, put on your fins, and get horizontal on top of the water, lessening the chance of stepping on any underwater hazard and keeping you from getting knocked over by slipping on uneven rocks.

e. With calm ocean conditions and clear water, using a snorkel during your entry from shore is a good idea. Think about all the air you will save as you make your way to your descent point in deeper water – air you can use to enjoy your dive a little longer. If the surf is rough then you should put on your fins before entering the water and enter or exit the water sideways or facing back while holding on to your dive buddy.

f. Trim your gear – make sure there are no dangling pieces of equipment like your octo, gauges or computer.

g. Carry a dive knife/tool or other device to cut entanglement material.

2. MARINE LIFE.

One of the reasons I SCUBA dive is to observe marine life in their habitat. As a diver who is passionate about conservation of the environment and marine life, I practice a few important rules when approaching all marine life to minimize the risk of harm to them and to myself. Most marine life injuries stem from an animal’s natural response to a perceived threat, a simple defense mechanism for their preservation. Such attacks and injuries are a response to something we have done either on purpose or accidentally.

Wiggle a finger in front of a moray eel and you may find out how vicious and painful their bite can be. Ah, but the turtle seemed so friendly – what could possibly go wrong by sticking a finger in front of it. Well, the cute little turtle can easily remove that wormlike finger from your hand with surgical precision. In spite of all the training and great advice from dive instructors and seasoned divers, some individuals seem to lose all sense of reason when diving and get injured.

Not all marine life injuries are the result of provocation. While unprovoked attacks by marine life are rare, they can result from inadvertently touching an animal or organism. Examples of unintentional physical contact with sea life are brushing against jellyfish, stepping on an urchin, stonefish or stingray, or bumping onto a scorpionfish as all of these can be hard to spot. We could also get cuts and scrapes by brushing into coral or barnacles.

Marine animals can be inquisitive at times too. A few months ago a beautiful lemon shark followed me to the surface after a wreck dive, coming within 4 feet of me. I just remained suspended in the water column while completing my 3-minute safety stop mesmerized by the beauty of this animal. The shark was so close I could have swum towards it and touched it. Why didn’t I? As I said previously, an important part of my dive ethic is to “respect all marine life”. Even though I didn’t get to touch that shark, the memory of that special moment remains vivid inside of me. Most important, I experienced that moment without harm to the shark or myself.

Mitigation Strategies (Marine Life)

a. The most important way to minimize the risk of being harmed by marine life is to treat all creatures with respect. It’s not nice to touch or engage in harassment of any animal – keep a safe distance and your hands to yourself or better yet, on your camera so that we can enjoy your photos or video.

b. Develop and practice good buoyancy skills – stay off the bottom.

c. Wear adequate protection for your feet and skin that is consistent with the water temperature and environment.

d. Always be aware of your surroundings, 360 degrees horizontally, below and above. I know of a diver taking pictures while buoyant above the bottom when a young adult landed on her back at depth, pushing her onto the bottom and causing her to land on top of an urchin. No matter how many safeguards we put into effect for our safety, there is always a chance that an accident will occur.

A few recommendations related to hunting underwater.

e. Handling of spears on a dive boat, during entry into the water and exit present a higher level of risk. Grab your spear gun at the back of the boat before entering the water with the bands are undone and its safety on until you are underwater and ready to shoot. When getting back on the boat, hand your speargun to the boat’s divemaster with the bands undone and its safety on before climbing back on.

f. Sharks will be aroused by more than the smell of blood – the sound made when the shaft is released will also get their attention.

g. Whatever you catch i.e. lionfish, can still sting you even after you are back on the boat. Place your catch in a container that is appropriate to ensure your safety and that of your fellow divers.

Other comments and additional recommendations I leave to the hunting experts.

3. BAROTRAUMA.

Barotrauma refers to injury to the human body because of pressure related changes in different body compartments. Examples of this are Decompression Illness which includes Decompression Sickness (DCS) or “the bends”, Arterial Gas Embolism (AGE) and other types of lung expansion injuries such as Mediastinal, Subcutaneous or Pneumothorax emphysema. These are some of the most serious risks associated with SCUBA diving. We need to be cognizant of the causes which lead to these events and develop both diving disciplines and lifestyles that will minimize the risk of these injuries happening to us.

Body Cavity Squeezes (Ears, Sinus Cavities, Teeth, Mask and Wetsuit) are also related to barotrauma. A squeeze takes place in unequalized air spaces in our bodies like the middle ear, sinus cavities or teeth. These issues can quickly turn into an emergency underwater with consequences ranging from mild discomfort through excruciating pain and damage to our eardrums or teeth. A squeeze can also happen in the air space inside your mask, hood and wetsuit as the air inside these is compressed during descent. A mask squeeze occurs when we don’t exhale through our nose into the mask during our descent. In the case of teeth, gas spaces underneath a cavity or filling will compress during descent with the potential to implode, and to explode upon ascent as gasses expand. As you can imagine, this could be very painful.

Mitigation Strategies (Barotrauma)

The following are lifestyle/general recommendations to help us diminish the likelihood of experiencing barotrauma.

a. Stop smoking or vaping – this is a clear choice you must make, one that nobody else can make for you other than offering encouragement. Yes, I fully understand how difficult quitting can be. I quit smoking 15 years ago.

b. Exercise regularly. I walk, jog, or ride my bicycle twice a day. Your level of exercise depends on your age and existing level of fitness. Always seek advice your physician’s advice before engaging in a fitness program.

c. Observe a healthy diet. Be nice to your body by making good choices about what you eat.

d. Hydrate. Not just in preparation for a dive but as part of your daily routine. Our body tissues and organs need water to function properly, to remove toxins / impurities, and lubricate joints. How much water you need in order to stay hydrated depends on the climate, your level of activity and physical condition, and even your age. As a general rule you should drink at least 6 to 8 glasses of water every day. If you don’t practice good hydration habits then begin hydrating the day before your dive – don’t wait until the last minute.

e. Take good care of your gums and teeth. Visit your dentist and make sure your mouth is free from cavities.

The following mitigation strategies are more specific in nature.

f. Don’t dive when you have a cold, chest, nasal or sinus blockage or congestion.

g. Plan your dive and dive your plan. At the time of your dive you can make last minute modifications taking into account visibility, ocean currents and overall weather conditions.

h. Analyze your gas mixture to make sure it is what you plan to breathe during your dive. Telling your dive computer what mix you plan to use does not magically change the mix in your tanks.

i. Stick to the depth and duration time limits established by your dive computer and dive tables for the mix of gasses you are breathing and don’t push these boundaries. Whenever possible shave off a little time, giving you more time during your ascent – be conservative! That wreck, reef or cave will still be there tomorrow … and the next day as well so you can come back and explore it again.

j. Watch your ascent rate. Most dive computers will give you a visual indication when you are ascending too fast. If you find yourself without a dive computer remember not to ascend faster than the slowest bubbles around you. The recommended rate should not exceed 30 feet per minute.

k. Perform a safety stop. At the end of every dive (not including training dives in shallow water) you should stop at a depth of between 15-20 feet for a period of 3 to 5 minutes. This is NOT a decompression stop but an important mitigation step to help reduce the risk of getting decompression sickness. I do not recommend performing the safety stop at a depth shallower than 15 ft. The reason is that sometimes, wave through to crest variance can be substantial, quickly changing your pressure level. Remember that the greatest changes in pressure occur at the very top of the water column. In addition, being that close to the surface places you at greater risk from boat traffic even when you have deployed a safety sausage.

The following mitigation strategies address problems related to squeezes.

l. During your descent, don’t wait until you feel pain to start equalizing your ears. Always start equalizing at the surface before beginning your descent on the water column. Use whatever technique works best for you. I use both a gentle application of the Valsalva maneuver and horizontal movement of my jaws.

m. Exhale through your nose during your descent and throughout your dive.

n. Gently pull on the corners of your hood to allow water to circulate during your descent.

4. EQUIPMENT FAILURE.

I am going to define two hazard categories associated with equipment failure. The first one addressing hazards associated with improper fit of dive gear to include booties, fins, wetsuits and drysuits, hoods, masks and gloves. For example, fins that fit too tight may blister your skin while a fin that’s loose will require a lot more effort during your kick and may come off during a giant stride entry. You should also adjust your mask so it’s not too tight on your face, allowing you to exhale through your nose during your dive to relieve pressure, to adjust it if needed, and to clear water out. A tight seal on your hood or seal around your neck can reduce your blood circulation or blood pressure, resulting in dizziness and even worse, causing you to blackout and drown.

The second type of equipment includes dive computers, buoyancy inflators, tanks, valves, manifolds, bands, first stage, second stage, octo, and out of air situations.

Mitigation Strategies (Equipment Failure)

a. Make sure your equipment fits properly and comfortably. I prefer to purchase dive gear at a dive shop. There is always someone there to help me chose gear that fits properly. Other items I can easily order from an online store but when it comes to wetsuits, mask, fins, hoods and gloves I prefer to try these on to make sure they fit properly.

b. SCUBA tanks require a visual inspection (VI) once a year and a hydro test every five years. A dive shop will typically check the date of your last VI every time you bring a tank in to be refilled. The date of your tank’s last VI is punched into an adhesive sticker bearing the name of the diveshop that performed the inspection. When a hydro test is performed the date of the test is stamped on the tank as a visual reminder.

c. When you bring a tank in for a VI, most dive shops will also clean the tank’s valve. Ask your dive shop to make sure this is done at the same time your tank undergoes its VI.

d. Support a local dive shop. Find a dive shop and develop a good relationship with them. Bring your gear in and ask them when it should be serviced. Each brand will establish their own frequency of function checks and inspection standards. You should take into account how often you use your gear. I prefer to have my BC inspected once a year and my first stage, second stage and octo every two years.

e. Take good care of your gear – you would be surprised how much longer your gear will last by just rinsing it with fresh water after every dive and allowing it to dry before storing it. Fill your BC’s bladder with fresh water, blow air into it and flush salt or pool water out of it two or three times. Once you have done this, fill the BC with air before storing it. Do not allow water to get into your first stage!

f. Check the battery charge on your dive computer before and after every dive. I replace my battery whenever it reaches 50% charge.

g. If you use doubles have your dive shop check and clean your valves and manifold every time you VI your tanks.

h. NEVER lift your doubles using the manifold as a handle. If you are diving on a boat bring your doubles onto the boat on your back and remove them the same way. Do ask the crew to use the valves to lift your tanks and not your manifold. I use HP 100’s on my double rig so few crewmembers will handle them.

i. Remember that service kits for your equipment may not be available forever. If you bring in a first stage, second stage or octo to a dive shop to be serviced and the equipment is 10-15 years old then there is a good chance that service kits will no longer be available. And try not to bring your gear in to be serviced a week before you need it. Service kits may take a few days and sometimes longer to get a hold of, and you may end up having to take your gear as is (not recommended) or renting a set from a dive shop.

j. Start monitoring your air supply as soon as you get to the bottom and regularly during your dive. Ask your dive buddy occasionally how much air they have left. Begin your ascent making sure you will have enough air in your tanks to complete 3-5 minute safety stop, inflate your safety sausage and remain on the water with your regulator in your mouth until you board the boat. Plan on climbing back on your boat or completing your shore dive with a pressure of at least 500 PSI left on your tank.

5. TOXICITY.

OXYGEN TOXICITY

Oxygen toxicity poses a risk to nitrox divers. In SCUBA diving, toxicity is the extent to which a gas is poisonous to the human body. Two types of oxygen toxicity are pulmonary and central nervous system (CNS). Pulmonary oxygen toxicity is caused by exposure to elevated partial pressures of oxygen over long periods of time. This is referred to as time-dose exposure and is mostly associated with technical diving and exposure over prolonged dives.

Pulmonary oxygen toxicity is not as much of a concern in recreational diving activities where nitrox is used. The reason for this is shorter exposure times when following the “No Decompression Limit” (NDL) guidelines, along with typical adherence to recommended surface intervals.

Central Nervous System Oxygen Toxicity is what recreational divers should be mostly concerned with as it occurs breathing oxygen at an elevated partial pressure can affect the central nervous system. An effect of CNS oxygen toxicity is convulsions. When convulsing under water, an affected diver can lose his/her regulator, and possibly drown.

By planning our diving depth and observing Maximum Operating Depth (MOD) limits, and diving conservatively we can substantially decrease this risk.

Mitigation Strategies (Oxygen Toxicity)

This article is written with the recreational diver in mind. For the purpose of this assessment I will focus on our recreational divers who use Enriched Air Nitrox (EAN). I make no reference or recommendation about gas mixtures or decompression stops. Instead I will address the importance of adhering to the Maximum Operating Depth (MOD) or depth at which the partial pressure of oxygen in a specific EANx mix exceeds its acceptable limit.

Suppose we are using an EAN34 mix for our dive. First, how do we know that the gas in our tank has a mix of 34% Oxygen? Because the dive shop put a label on the tank that says 34%? Hmm … I have my tanks filled at a very reliable dive shop but I take diving seriously so I analyze my tanks before picking them up to see what my mixture is. A reputable dive shop will maintain a logbook where customers enter the result of their mixture analysis.

What is the Maximum Operating Depth for EAN34? We can use one of many apps on our phone to calculate the MOD but we should also know how to figure this without the help of an electronic device. The formula is very simple.

 ((Maximum partial pressure of oxygen / percentage of oxygen in tank) – 1) x 33 ft

Note that most organizations involved in SCUBA diving recommend using 1.4 ATA as the limit for Partial Pressure of Oxygen (PpO2) so our formula is going to look like this:

MOD = ((1.4 ata / .34 ata) – 1) x 33 feet

Now let’s do the math:                                  MOD = ((4.12)-1) x 33) = 3.12 x 33 = 103 feet

In this example the Maximum Operating Depth when using an EAN34 mix is 103 feet.

a. Analyze your gas mixture to make sure it is what you plan to breathe during your dive. It does not matter what the label on the tanks says – be a responsible diver and analyze your own gas mixture.

b. Based on your analyzed EANx mixture, calculate your MOD.

c. Make sure your dive buddy knows your planned MOD.

d. Check your depth occasionally during your dive and stick to your MOD. If you are willing to accept the risk of calculating your MOD using a maximum PpO2 higher than 1.4 (such as the generally accepted 1.6 contingency) then be prepared to accept the consequence of your decision.

CARBON MONOXIDE TOXICITY

Carbon monoxide (CO) poisoning has injured and claimed the lives of many individuals around the world. This gas has no color, odor, or taste. Back in 1974 while stationed in Seoul, Korea I remember the news of a fellow soldier’s death due to carbon monoxide poisoning. He had decided to spend the night with his girlfriend at her house in the local village. The house’s heating system relied on charcoal cylinders placed under the homes. During the night, carbon monoxide leaked through the floor into the bedroom. The soldier and his girlfriend died in their sleep.

Carbon monoxide poisoning is an issue of great concern in the SCUBA diving industry. The greatest problem with carbon monoxide is that it bonds with hemoglobin in our blood easier than oxygen at the molecular level preventing oxygen from making its way through the bloodstream to our vital organs and tissue. CO can make its way into our SCUBA tanks through a poorly maintained compressor or inadequate placement of a compressor’s intake.

Mitigation Strategies (Carbon Monoxide Toxicity)

a.  Have your tanks filled at a reputable dive shop, by qualified technicians.

b.  Although carbon monoxide is odorless, the gas is often introduced with other contaminants that could have a smell. One example is the smell of car exhaust. As you check your equipment in preparation for a dive, purge air through your regulator’s second stage and smell its content. If there is any smell I would not use the tank.

c.  If during a dive you experience symptoms like dizziness, headache, nausea or vomiting, shortness of breath, or blurry vision you should terminate your dive immediately. There is a good chance that you are already suffering from carbon monoxide.

Now that we have a fairly comprehensive framework to mitigate risks associated with SCUBA diving, let’s decide what our risk management plan will be to help reduce the risk of a mishap, to become self-reliant divers. Our strategy could consist of taking better care of our bodies by observing good eating habits or exercising.

Another component of our RMP should be training. I recommend that you enroll in a Rescue Diver course. There are many great providers – I happen to be very happy with the knowledge and skills learned through SDI/TDI rescue diver training.

There is so much more to be explored and discussed in regard to risk assessment in the SCUBA diving industry! The risks associated with the operation of dive boats and a brick and mortar diveshop that provides gas refills, equipment sales and repair, and where SCUBA training is conducted are quite different and more complex.

I look forward to exploring and writing more articles about this important topic. Until we meet again, dive safely!

                                                                                                                Eduardo R. Zayas

My sincere thanks to TDI/SDI for being the first to publish this article. To see this and other interesting SCUBA diving articles please visit their website tdisdi.com.

Tech Diving – Equipment Purchases

Before I go into a description of equipment you may need for Tech Diving, I want to offer my opinion about making your purchase. I am not trying to endorse any product or retail sales outlet. What I will share are details about the types of equipment I have purchased, use and have observed on the work bench. My suggestions are based on personal experience and are shared in the context of managing risk.

Let’s face it, this amazing sport we engage in – SCUBA Diving, does pose some risk. This is the reason why we train, why we stay in shape, and constantly read and learn from other diver experiences and knowledge.

One risk we are always exposed to in diving is that of equipment failure. This could be a simple problem like a slow leaking hose, or a catastrophic issue resulting in the quick loss of our air supply. When we were first certified as Open Water divers, we learned many important skills like buddy breathing, and how to perform an emergency ascent. Although useful at depths within the recommended limit of 60 feet for Open Water divers, these would be of little help if you were doing a technical dive at 130 feet. Even though we could never completely mitigate the probability of any of these happening, we can still take some steps to help reduce the risk of their occurrence.

Yes, SCUBA gear can be expensive … very expensive. When purchasing gear for tech diving like bands to pair up tanks as doubles, left and right post valves, crossbar manifold with isolator valve, Deco bottle and harness with associated valve, first and second stages, BC plates and wings, and a dive computer that is suited for diving beyond your No Decompression Limits (NDL), you will have several brand names and vendors to choose from. But another set of choices besides the traditional dive shop or online retailer purchase is available. This one is the used SCUBA gear market. Don’t get me wrong – you can find some great deals but, in the end, you get what you pay for. I have seen used gear purchased through some of the online groups out there. Some of the gear I have seen is in good working condition. Other items however … how do I say this … will substantially increase the probability of a catastrophic event happening. Not long ago, when servicing some tank valves, I found doubles gear so old and badly maintained that a knob fell apart when trying to remove it and some rubber parts no longer worked. I am glad that the individual who made the purchase brought the gear into our shop for servicing before attempting to dive. So, this is what I recommend.

First, if you can afford to purchase your Tech gear new, take time to research available products for durability, features and price. Check out consumer reports. Then, head out to your favorite dive shop and listen to their recommendations. In the end, choose a product you think will work well and that you will be happy with.

Second, if you are lucky and make a great purchase in the used market, take the gear to your favorite dive shop and have a certified technician check it and service it as needed. Buying your gear from a dive shop will help establish a relationship where you can benefit from their vast experience, and just as important, support your local economy.

Remember, that when diving, safety comes first. Take no chances..

Next time I will share more information about the equipment I use and will let you know why I chose a specific brand or model. Until then, dive-dive-dive and … be safe.

Tech Diving – Is it for me?

Well … let me answer by telling you what I believe Tech Diving is and how it relates to my diving ethic.


My passion for diving dates back to my childhood when I used to watch “Sea Hunt” episodes on television. Even with Black and White television, Lloyd Bridges captivated my imagination with his amazing adventures under the sea. Born in Puerto Rico, I have been told that my first words were “Guagua ba paya” (baby talk for “the bus will take us to the beach”. Some of my fondest childhood memories were with family, snorkeling, playing and building sand castles at the beach.

I received my Open Water certification in March 1990, while stationed in Okinawa, Japan. Back then diving was one of the most popular activities with friends and the military community. For me from the very beginning SCUBA diving was a means to observe all the beautiful marine life living around the island of Okinawa and the nearby Kerama islands. Diving also gave me the opportunity to socialize with others who shared the same love for recreational diving and our oceans. Drift diving back then let me feel a sensation of freedom I had only dreamed of before.

Since then I have achieved several other diving certifications, each of these enabling me to engage in specific activities underwater. For example, Peak Buoyancy training enabled me to navigate my way around reefs without adversely impacting marine life there, descending and ascending in the water column with simple changes in my breathing pattern. Advanced Water training provided me additional knowledge and skills that enabled me to dive deeper to observe more types of marine life and wrecks. Underwater Photography refined my skills at taking still photos and video underwater, allowing me to share the beauty of our oceans and springs with many others.

A year ago I decided to become a dive professional. I pursued and achieved Nitrox, Rescue Diver and Divemaster certification with SCUBA Diving International (SDI). The latter, because I wanted to strengthen my diving skills to that I can help others.

So why become a Technical Diver? Since the first day I fell in love with SCUBA diving, I have trained to master skills to the end of observing the beauty of our oceans. As a dive professional, I am now looking for the very best diving etiquette – a discipline that will enable me to safely explore the ocean even deeper and for longer periods of time all the while understanding and fulfilling my obligation for decompression. Yes, I dive to the end of enjoying the beauty of our oceans but never loosing sight of safety, personal and global awareness.

Next time, I will share details about some of the equipment I use for Tech Diving and some of the dive sites where I have trained. Until then … clear skies and safe diving my friends.